

How to Set Up an Aquarium Bubbler (Airstone)
Posted on July 05 2024,
The aquarium bubbler setup process is fairly simple and straightforward, but no one is born knowing this stuff. For beginners, we put together this brief guide to get you started.
What Do You Need For An Aquarium Bubbler Setup?
1. Airstone
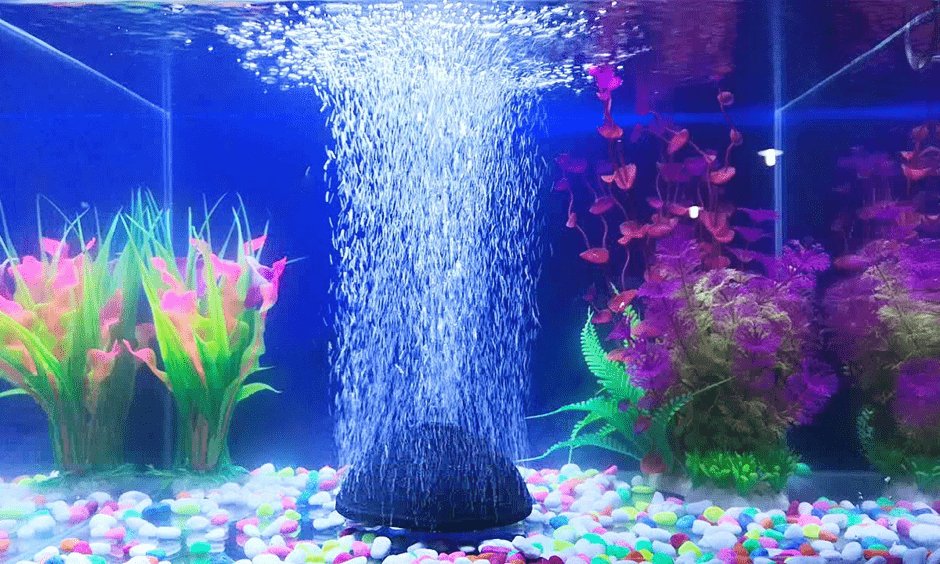
The first thing that you need for an aquarium bubbler setup is an airstone. It creates the actual bubbles in the water. Some of them are circular and quite small, while the larger ones are rectangular or tube-shaped. A few of them may come with integrated LED lights for enhancing the aesthetics of your aquarium.
2. Air Pump
The second requirement is an air pump. An airstone can create bubbles, but it needs a pump to supply air. Some airstones include an air pump, although others may require you to purchase one separately.
3. Accessories
You will also need a few accessories. These include airline tubing, one-way air valves, and regular air valves. Most aquarium bubbler kits come with these accessories. If yours does not, then you will have to purchase these accessories separately.
Aquarium Bubbler Setup Process

The first step is to install the air pump. It can be placed outside the aquarium, under its stand, or in a cabinet. While placing it, make sure that there is adequate space for wires and tubing, as well as enough air circulation around the pump. After placing the air pump, attach airline tubing to its outflow valve.
Next, attach the regular air valve to the tubing coming from the pump. It will allow you to regulate the amount of air that flows into the airstone. Use a sealing mechanism to prevent any leakage of air from the joint between the valve and tubing.
Attach some more tubing to the free end of the regular air valve. Then install the one-way valve into the tubing. This valve is designed to prevent the air or water from flowing into the air pump in case of power or equipment failure. Make sure that the orientation of the valve is toward the airstone. Seal the joint to avert any leakage. Then attach more tubing to the other end of the one-way valve.
You must have a one-way check valve installed if you place your air pump under the top of your aquarium water. If you place the air pump under the top of the aquarium and there is no check valve, then you will risk allowing the water to “siphon” out of the aquarium upon a pump malfunction, causing a flood. If you do not have a check valve or just don’t feel like taking the risk, then install the air pump above the level of the aquarium water.

Now, attach the airstone to the tubing coming from the one-way valve. Again, use a secure sealing method for preventing the air from leaking. Some airstones may need to be soaked for up to 30 minutes before they can be attached to the tubing. Then place the bubbler stone at the desired position in the tank.
Most airstones are heavy and will settle down on the bed of the aquarium. A few of them, especially tube-shaped ones, may come with suction cups for installation. Place the airstone at such a position so that it improves the aesthetics of the tank without obstructing the view. If your airstone has wires for LED lights, then connect them.
After all the connections have been made, switch on the air pump and adjust the airflow using the regular valve as desired. Your aquarium bubbler setup is now complete!
0 comments